Showing posts with label home decor. Show all posts

11/12/2018

Easy Thanksgiving/Fall TableScape

Here is an easy way to put together a Thanksgiving TableScape.

1. Lay down a light colored table runner.

2. Add garland from your local craft store in the middle of it.
You could use some branches from your yard too.

3. Add some small fall decor items, pumpkins, pine cones, apples, fruit, etc.
You could also use real fruit here too.

4. Add 2 candle holders at the end of the table runner.

5. Add your plates, cups, silverware, and fabric napkins.

6. Not pictured but fun to add, are a name place card of some kind.


 I love this table runner from Target. It washes up well, and doesn't wrinkle to much.
A garland idea  and small metallic pumpkin gourds from Hobby Lobby.
Gold Candle Holders and Candles from Target.


Other Thanksgiving TableScape Inspirations:

Emily Clark
Fancy Farmgirls 
Jones Design Company


3/17/2017

Spring Decorating Ideas

One of my very favorite things to do is organize and decorate my home.

But, it's really hard to do with kids, kids, budgets, kids, time, kids,
husbands, life, messes, life, and kids, etc.

Wayfair wanted to make it easier for us by making a list of some
current Spring Decorating ideas we can add to our home. 

Just pick 1 of these ideas to add to your home this season.
This makes it easier.
Treat yourself to one of these for Easter, or Mother's Day.
If kids can get jelly beans, then we can get 1 thing to make our house happy.

11/14/2016

Instagram Photo Ideas

Have you seen this video yet?
It was making it's way around Facebook a couple of weeks ago.

It's BRILLIANT!

I've watched it over and over,
and still find new details that make me laugh.

I just found out that the girls of studio C helped write the commercial.
Of course!


I do enjoy using chatbooks. The above video explains it all.
You can use my code to get your 1st book free! JR3MJUA2


I used the Artifact Uprising App
to put up 25 of our family instagram photos on a wall in our home.
They had a discount that I watched for.

If you google instagram prints,
there are other companies to look for.
Shop around to get a deal that works for you.


I love the wall,
and liked the quality of the prints from Artifact Uprising.
(I'll let you guess which room in the house I put these prints.)
I hung each photo by using blue painter's tape.
It doesn't hurt the photos or the wall, but hangs up well.

Even though,
I haven't tried this idea for my instagram photos,
I like it.

Magnets made out of your photos.


She put her magnets on a framed magnetic metal board.
I think this is fun idea for a kids and families to enjoy their photos.

5/20/2016

Painting Furniture

I tried furniture painting an old shelf, recently.

Here are some of my tips:
I used The Frugal Girl's blog post on furniture painting as my resource
A great resource with pictures!
Centsational Girl has a great furniture painting post too!

Plan on about 20-30 min. each day, over a period of about 4-5 days.
Don't plan on doing it all in 1 day.
Be patient with yourself, it takes practice furniture painting.

I've done it a couple times now over the years,
and I'm just starting to get better at it.
I'm still learning, myself, what works and what doesn't.

Basics to Remember:
Sand, Wipe off, Spray-on Primer, Sand again-wipe off, Roll on Paint

These steps work well together to give you a
finished, smooth, professional look to your furniture.


Step 1:
Sand the wood piece to remove the finish.
I used 80 grit sandpaper (This sandpaper feels rough.)
I like using an electric sander.
I just picked a sander up at my local Home Depot or Lowes or Amazon.

Step 2:
After you sand the piece, use a damp rag
to remove/wipe away all the fine dust on the furniture.

If there are any holes you need to fill or repair do this step next.
There is wood filler tubes, glue, paste, etc. you can also pick up from Home Depot or Lowes.
Step 3:
Spray on a primer using a spray can.
Use a primer color similar to the
color you'll be painting it. Grey primer works great for color;
white primer works the best if the finished piece will be white.
Apply 1-2 several thin coats of primer.
No worries, if there are a couple
spots you missed, since you will be painting over it anyway.
Step 4:
After the primer dries, Sand again! This time using a higher grit sand paper.
I used 220, this sand paper is very fine, and feels much smoother.
It's okay if some of the primer is sanded off. Your goal with this step is SMOOTH.

Be sure to wipe off the excess dust with a damp cloth again.

Then, take your hand over the piece of furniture to see if it feels smooth.
You many need to sand again if it doesn't feel completely smooth yet.

Step 5:
Time to paint. I prefer to roll on paint for the final paint color.

You can spray paint with a can, but spray cans, can get a little drippy for the final finish.
Spray paint cans works great for the primer step-
because it's fast, and if you get any drips, it gets sanded off later.
Spray paint cans also work great for smaller color changes, frames, vases, etc.

I prefer rolling on paint for larger pieces of furniture.
You could use a fancy paint sprayer for this step.
They are expensive and I just haven't invested in one yet.

For now, rolling on paint is the best for me, since I don't furniture paint that often.

Try to get a paint that has a satin finish to it.
That will give it a nice finished look.

I painted on 2 coats of paint.

If you need to take a break, you can put your roller in a plastic bag.
Plastic grocery bags work too, if your roller is larger.
You can leave your roller, like this for a few hours.
These little foam brushes work great for touch-up and some tighter spaces, if needed.

* Special note for this project, I used some leftover sample paint that was very flat.
There was NO sheen or shine to the paint.
So to help finish the piece I sprayed on gloss to give it a finished look.
But it didn't show anything really. So I wouldn't do that again.
Live and Learn- I do recommend getting paint that has a gloss, or satin finish to it.

4/12/2016

Decor Trend - Green Palm and Banana Leaves

Have you noticed some of the fun decorating trends with green leaves?
There's palm prints, banana leaf fabrics,
fiddle fig trees, ferns prints, etc.
Below are a couple of my favorite ideas
using these greens in your home:

Watercolor prints in gold, gallery matted frames.

I like the new trend in Fiddle Fig Trees.
Silk, artificial trees is a better option for me.

Adding a pillow with these fabric prints is a fun idea too!

Sources for finding these ideas:
1 // 2 // 3 // 4 // 5 // 6

For more inspiration on these trends:
Etsy has a great selection that is reasonably priced.

Laurel and Wolf is also a good source if you're interested in
some interior design services.

5/29/2014

New Red Window Coverings

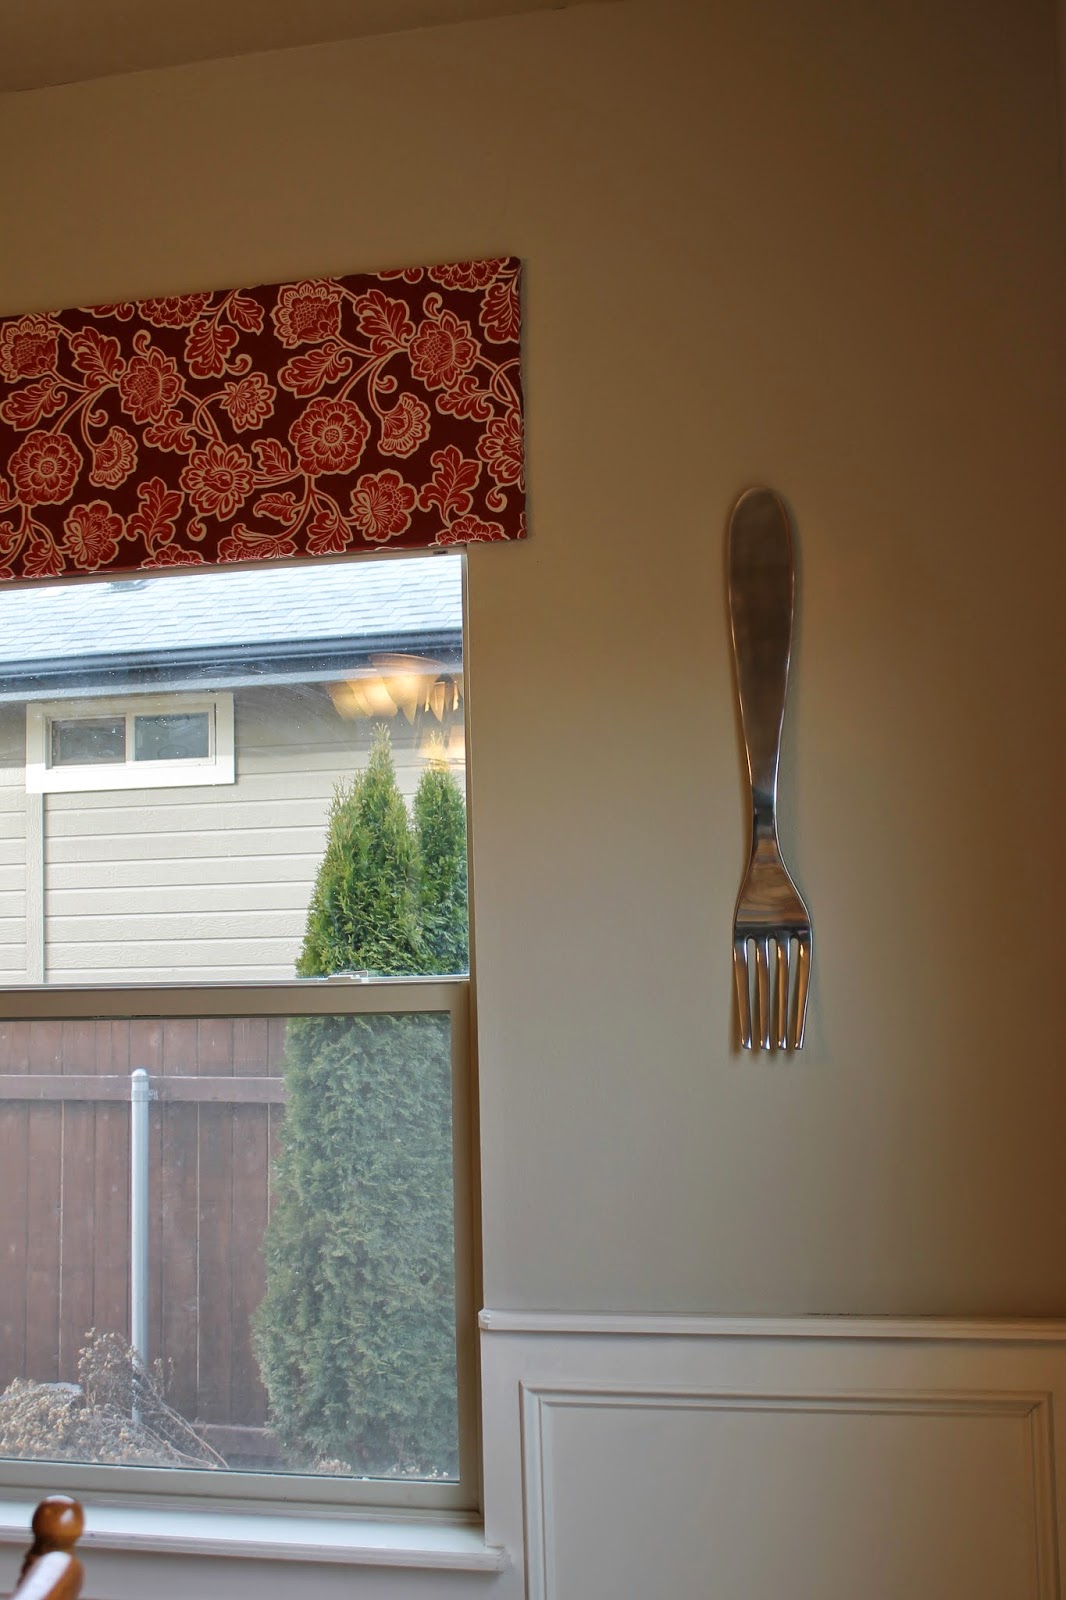
Last summer I redid my kitchen window coverings.


I measured the window length, and bought particle(?) board at Home Depot.
Each board was longer than the window length.
I had one of the workers at Home Depot cut 2 boards
the right length to fit both my windows.

I bought red, bold, patterned fabric at JoAnn's.
I was nervous to use this fabric.
It is bold, I had another fabric I was deciding between.
Lindy convinced me to go with the bold!
Lindy was right. I have loved them.

1. I hot glued the fabric onto the front of both boards.
(A staple gun would work just as well.)
I didn't cover the back of the board with fabric.

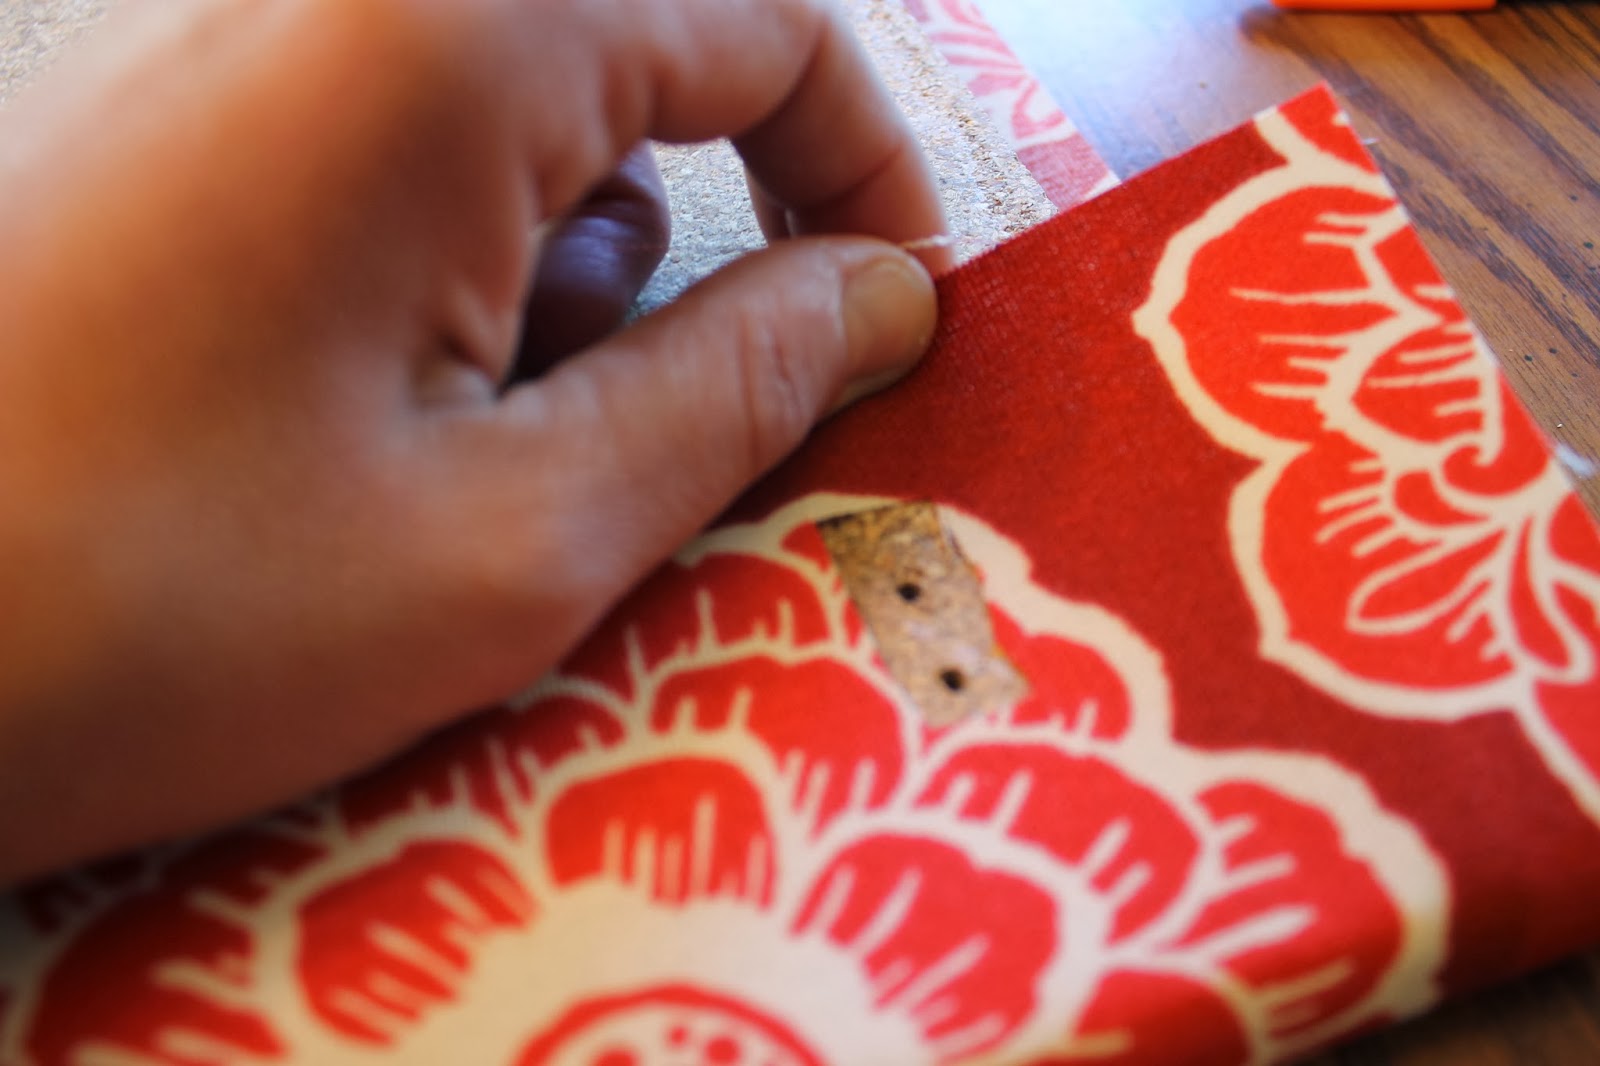
2. Using a pencil I marked where two holes needed to be,
to screw on the metal hangers on the back of the board.
I also cut a small square out of the fabric for the holes.

3. Then, I drilled two small holes and screwed in the metal hangers.
For each board I put a metal hanger on each side.


Ta Da!
P.S. I love red!
Can you tell?
I always need hints of red in my home decor.

5/28/2014

The Red Door

My front door had a wood stain to it.
Over several years, though, the wood stain started chipping away.

Our door was not made of real wood and so,
I tried a gel wood stain for a simple repair.
But within a few months to a year, the door looked just as bad,
and more of the original stain had chipped away.
Not to mention my DIY gel staining let some strange streaks.
Not very sightly for our front door the first impression to our home.

After reading this post,
I got the courage to paint our front door.

I sanded, taped, and primed the front door.
Sand
Tape
Prime
Paint
  I have loved it.

7/03/2013

The Craft Room - Done!


Guess what?  I actually finished the room.
I have AFTER photos.

Are you ready?

The room's not perfect.
I would probably do things a little different.
But it's done, it functions, and I like it.


The kid zone:
The Sewing Space
The Storage Space

The Gift Wrap Station


Where the stuff came from to put the room together:

Room Paint Color: Tempered Sage, Valspar
Green Wall Chalk Boards: Pottery Barn
Homemade Curtains and Fabric from JoAnn's (Thread Holder from JoAnn's too)
Wall Shelves: Lowe's
Desk: Office Depot or Staples?
Storage Baskets: Michael's and Fred Meyer
Word Frames and Wreath: Hobby Lobby
Bird and Birdhouse Picture: Fred Meyer
Gift Wrap Station: Old furniture from D.I. primed and painted white.
I screwed on the curtain rods to the upper shelf unit.
That's what I used to hold the rolls of gift wrap and ribbons.
See close up photo above.
Children's Table and chairs: Target
Mini Chalkboard signs: CostPlus
Sewing Machine: Costco

The truth about the room, now that it's done and I use it:

We still do almost all of our crafting at our kitchen table.
This room serves more as our storage place for craft supplies,
the room is not far from our kitchen.
The computer and family papers are not in this room.
I love that about the room.

It rarely looks like the above photos.
It's a project room, a place to store ongoing projects.
It's great to have a room for just that.

Here's what it looks like most of the time:

 Piles of Laundry, Legos on the floor, etc.
Undone kitchen curtain project, more legos. 
This is why doors are good things.
We just shut the door,
when we need to ignore something for a while.


1/29/2013

An Organization Tip or Two

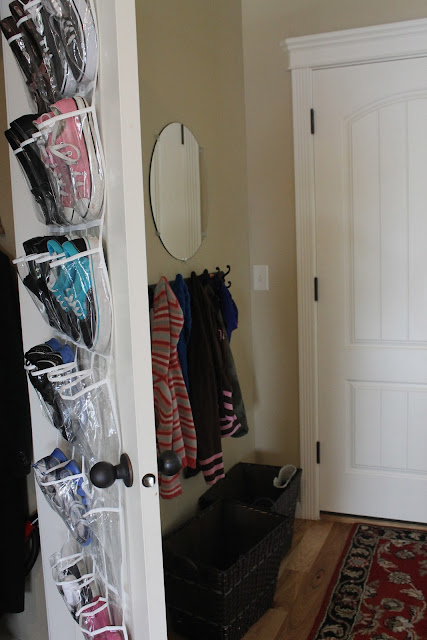
 It used to just be a door.
A door in our entryway.

Then, I got an over-the-door shoe organizer to place on the inside.
Suddenly, it was more than a door.
It became something cool, something useful.
I LOVE IT!

It was so simple, so easy to do.
It didn't require any drilling or using tools.
It was put together in 5 min. 

I've been in this home for years now,
why did it take me this long to do this idea?

Now, I go around looking at all my doors,
deciding which door is going to get one next.
It doesn't even have to store shoes.
It could hang on your pantry door, or your bathroom doors for all kinds of things.
When in doubt, pick a clear shoe organizer. Clear is always better.
Don't delay go get one of these tomorrow.


My next tip, is to hole punch your Christmas cards.
Then, get one of those office rings, and put all your 2012 Christmas cards on it.
Use it each year for your cards.
It's a super, fast, cheap way to keep your cards and enjoy looking at them each year.


I didn't come up with this idea. It's floating around somewhere.
A blog, or pinterest, I can't remember where.